| |
Mini T3.2
Hand soldering instructions for
SMD parts:
For DIY makers,
the correct method of doing SMD assembly is to put
solder paste on the board using a stencil, then manually
place all SMD parts and use a reflow oven or a hot air
gun to heat it. There are many demo videos available on
You Tube, but for a reason If you need to hand solder
one, it's a bit harder, but is still doable. I hope that
the following steps will help you achieve your goal a
bit easier.
 |
|
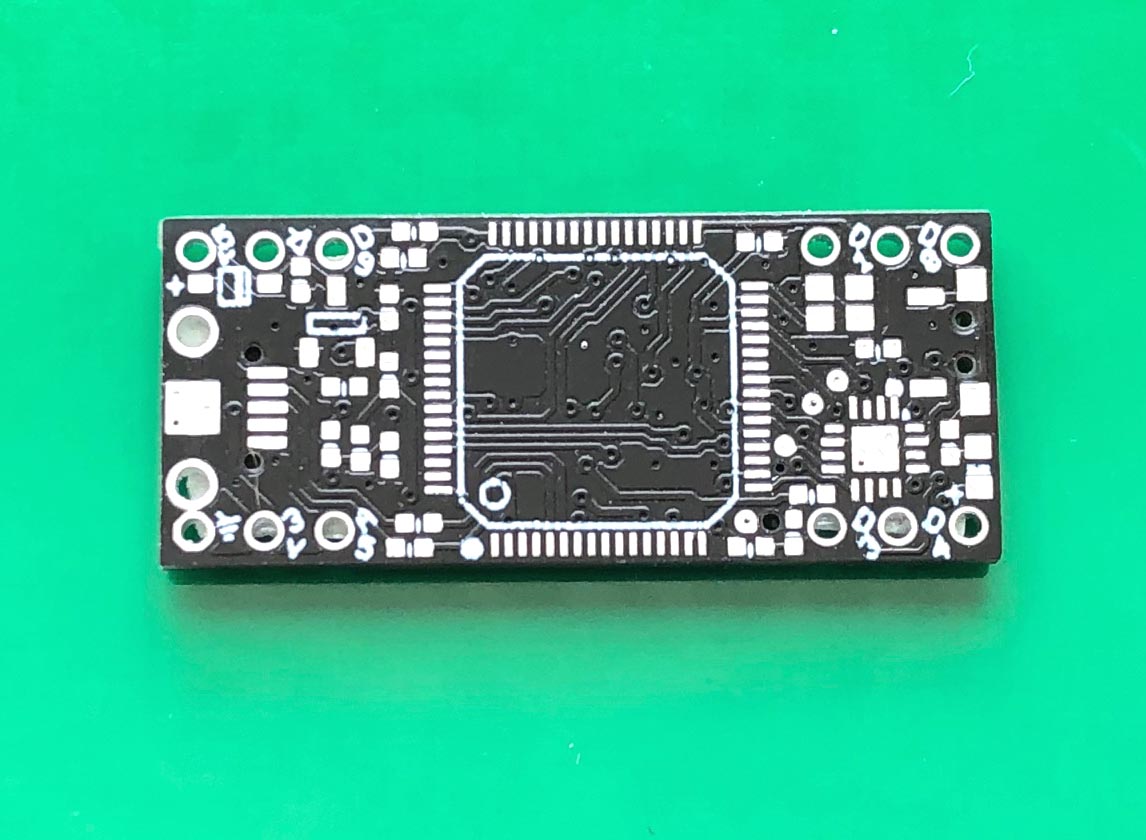
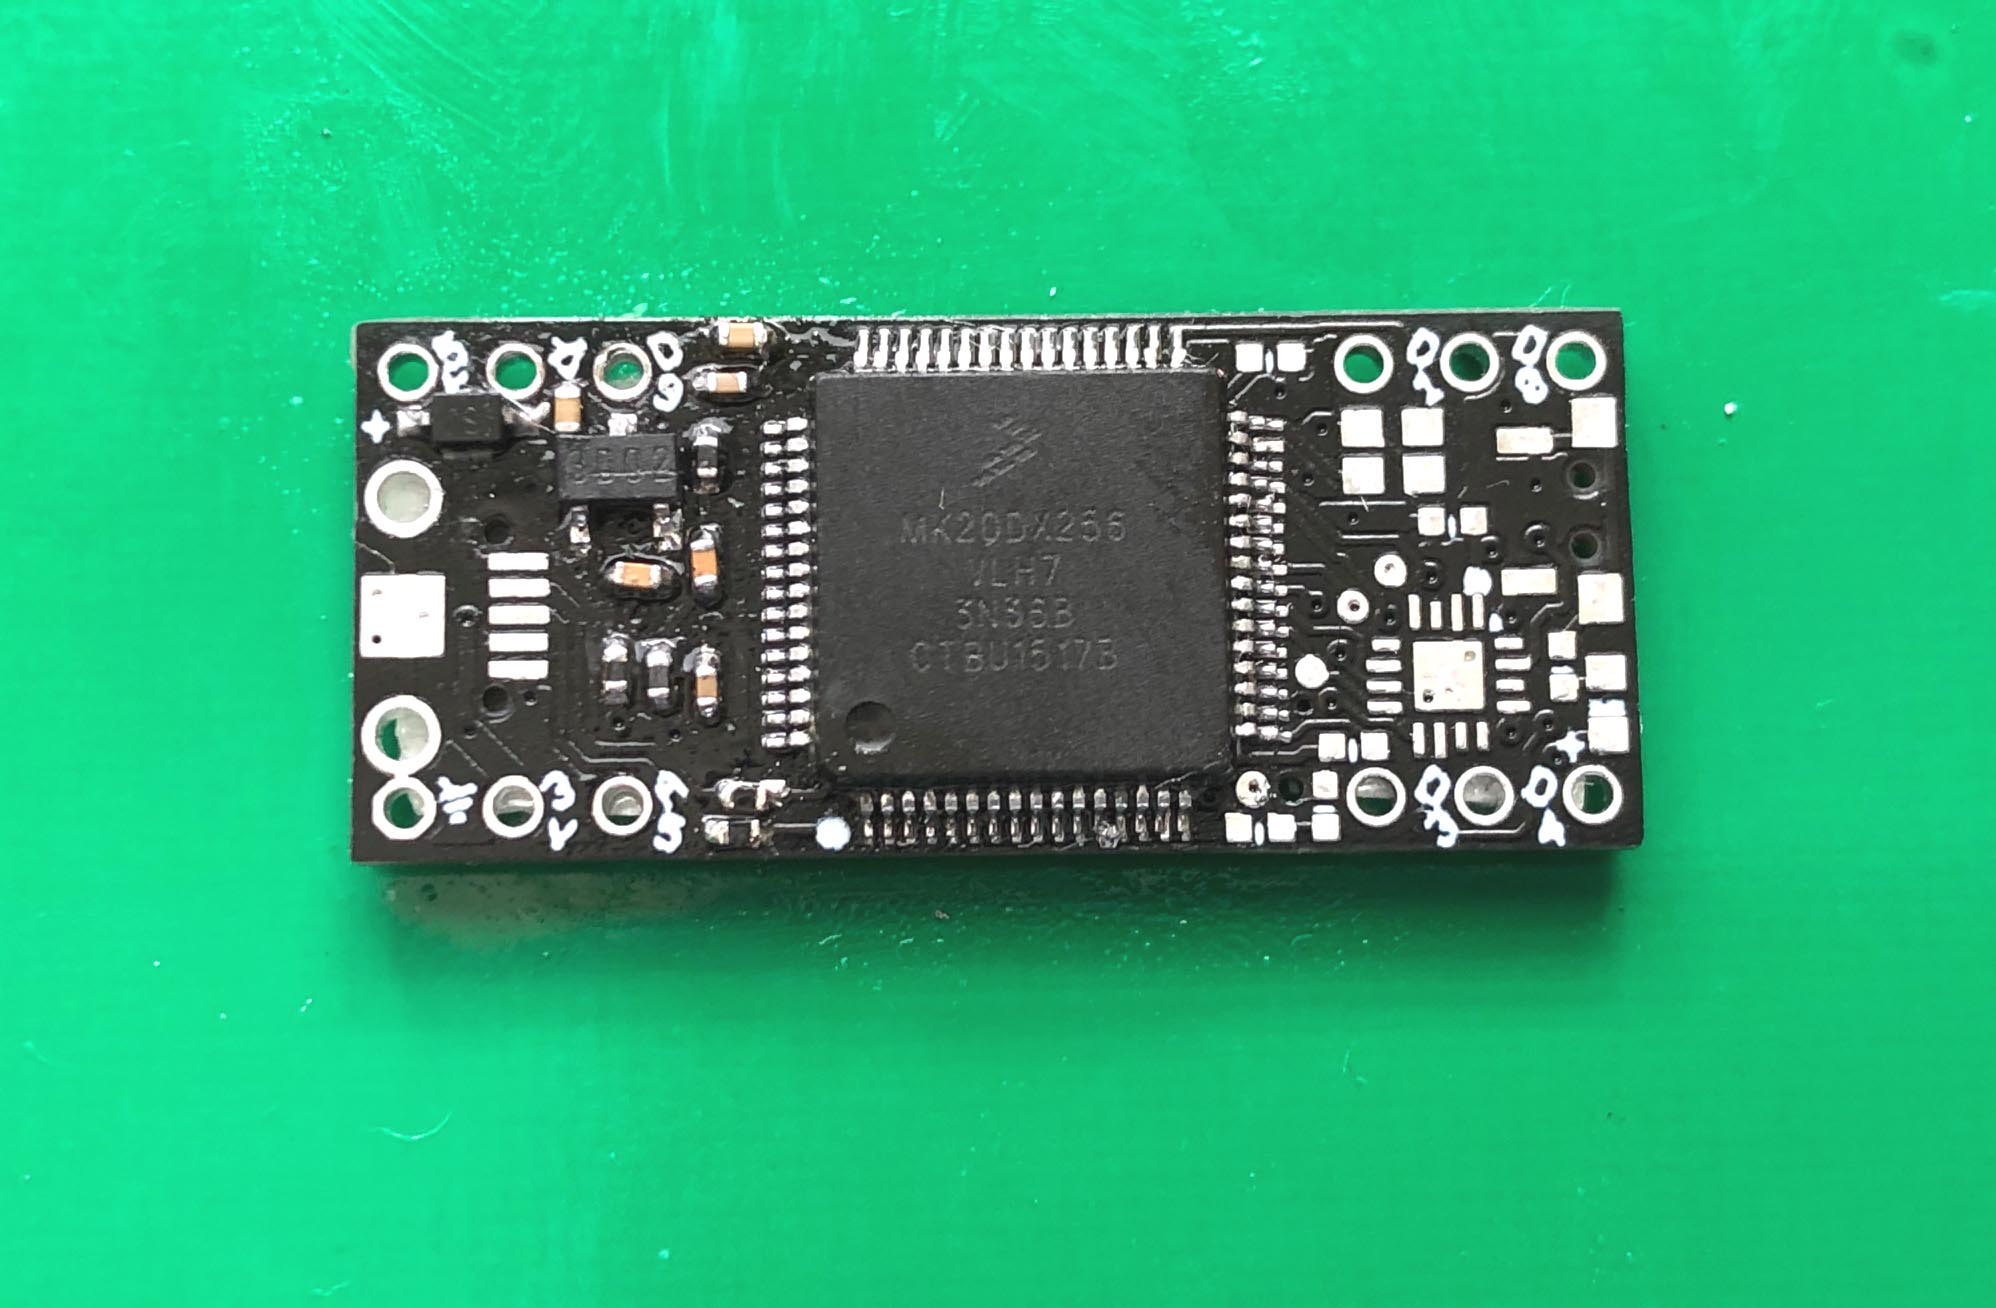
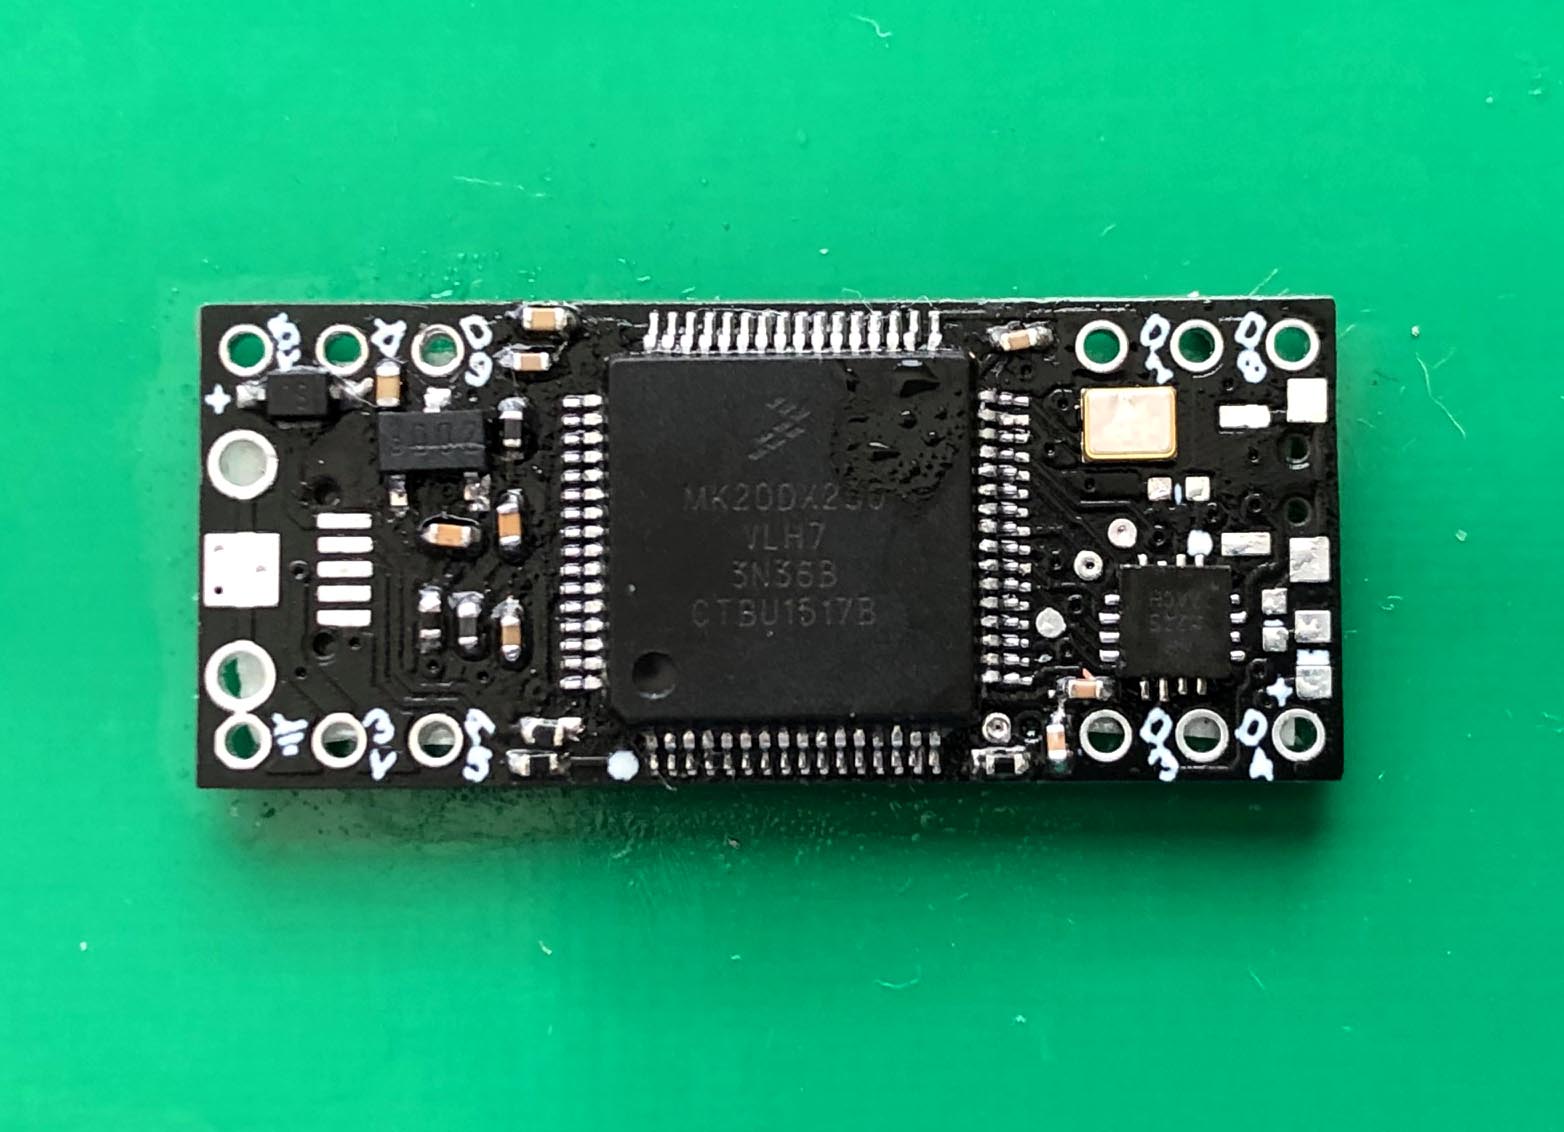
1. The blank Mini T3.2 PC board.
Below is the silkscreen with part numbers:
-
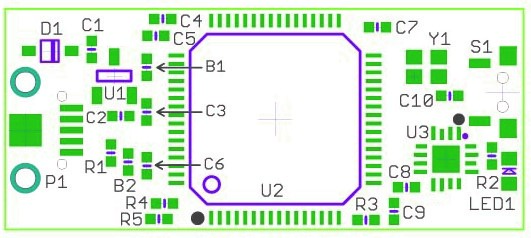
U2: MK20DX256VLH7 U3: Bootloader
made by PJRC.com
|
 |
|
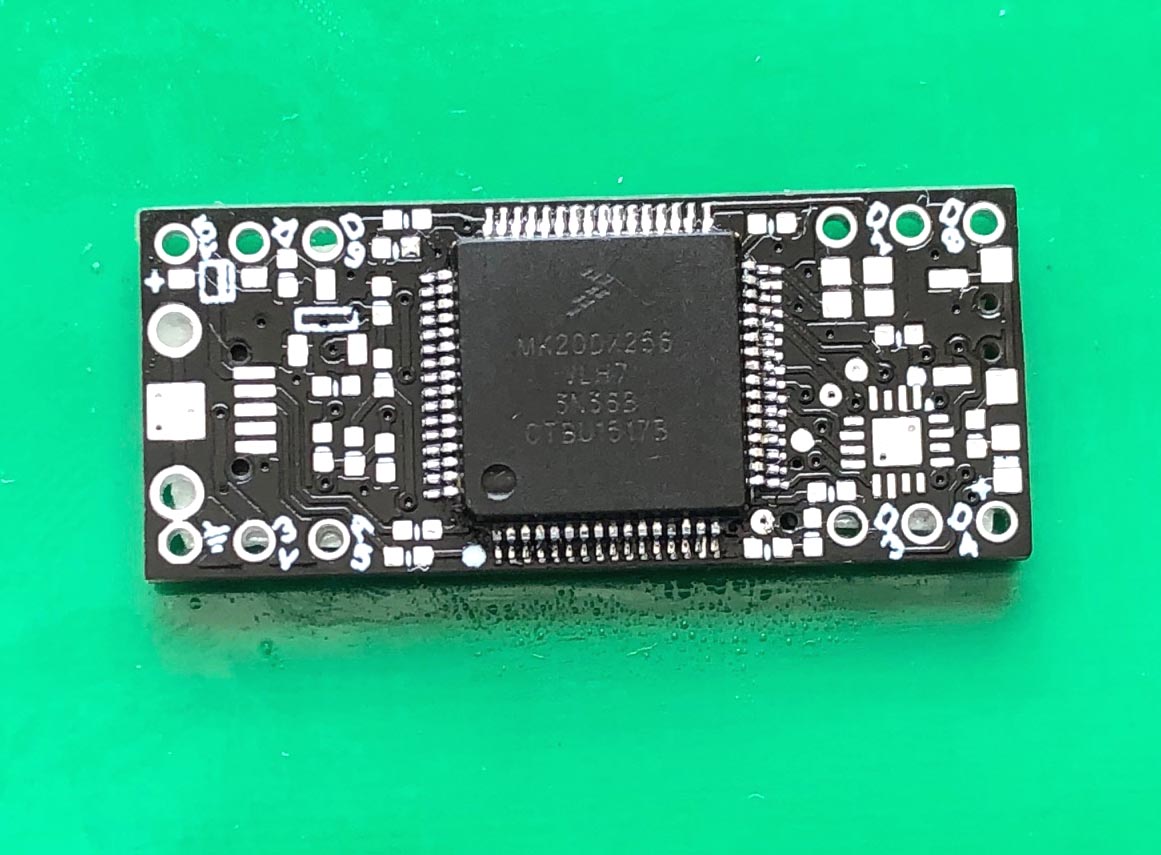
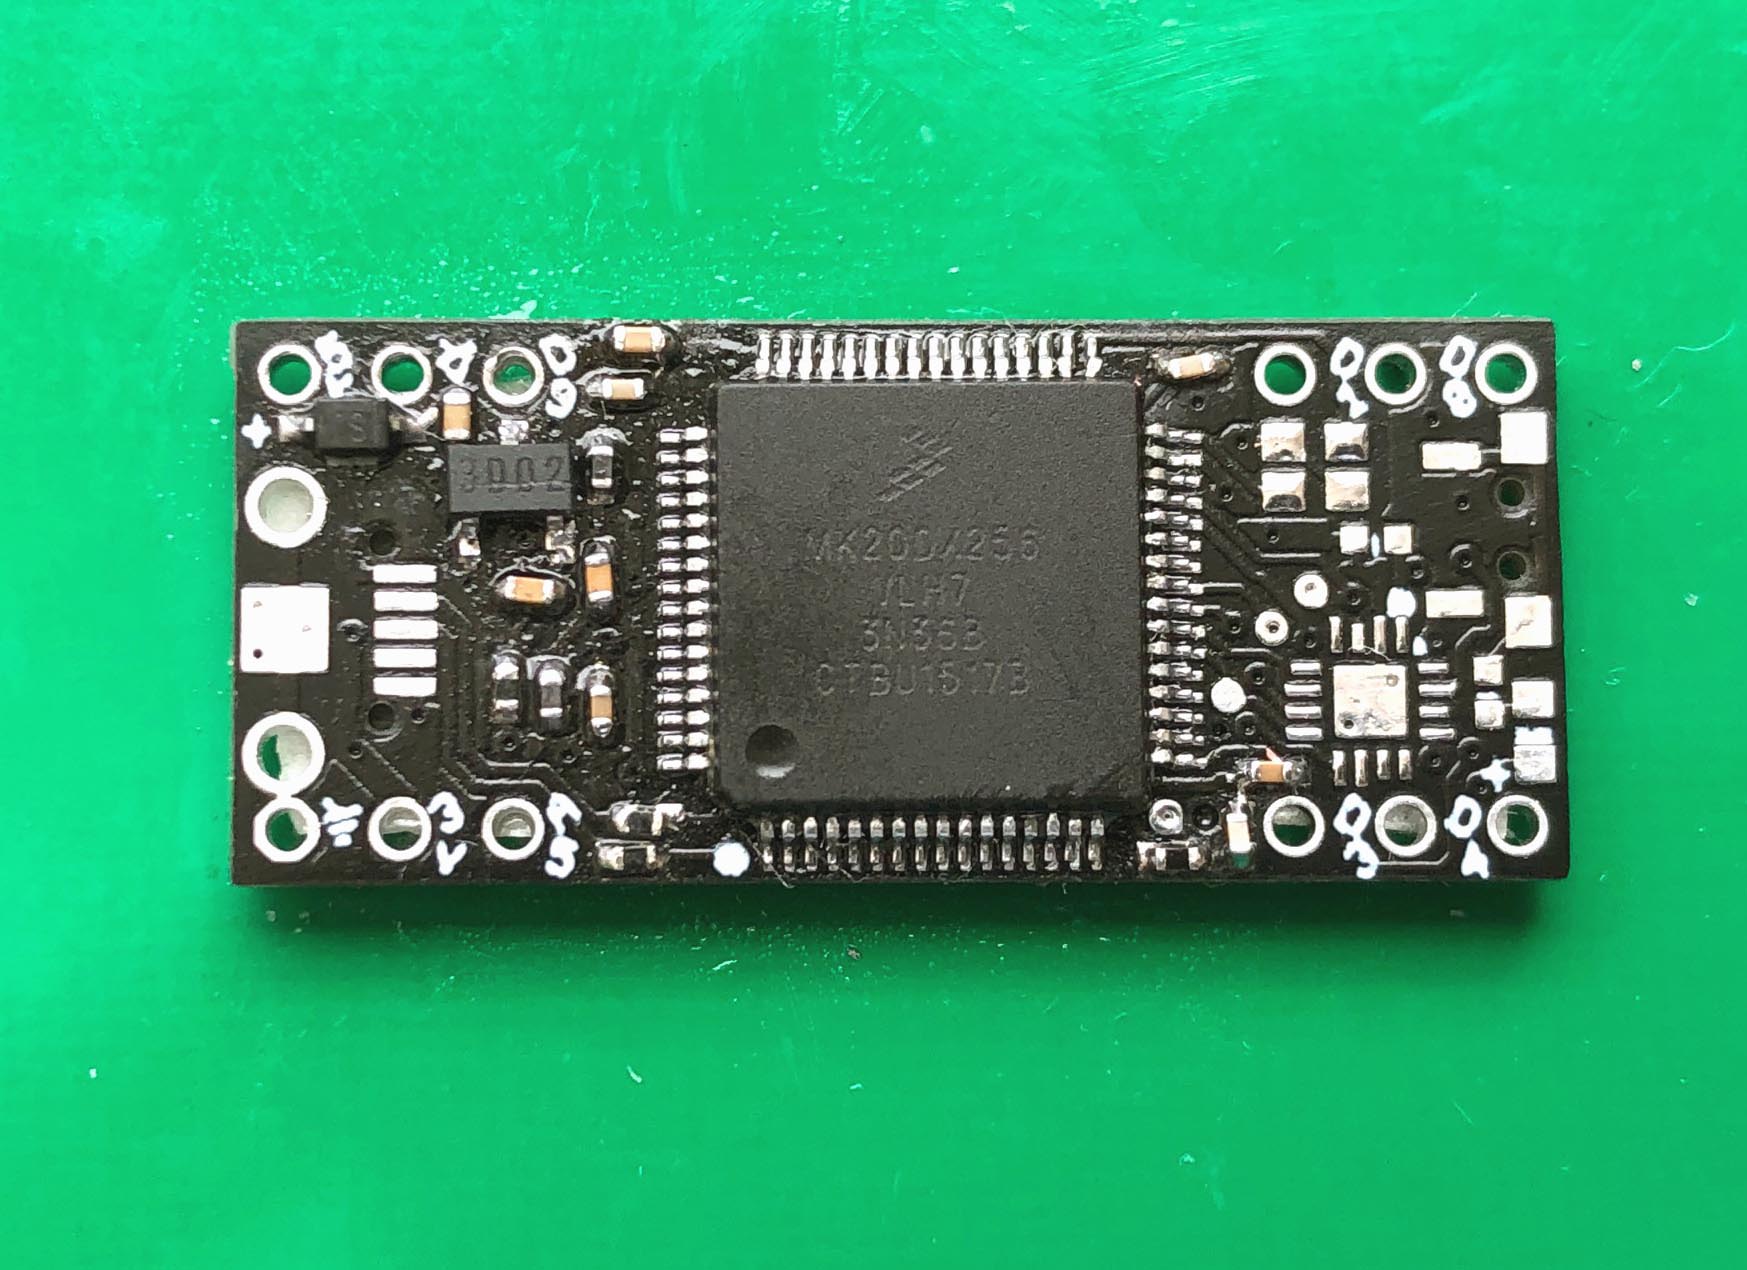
2. Drag solder the U2. |
 |
|
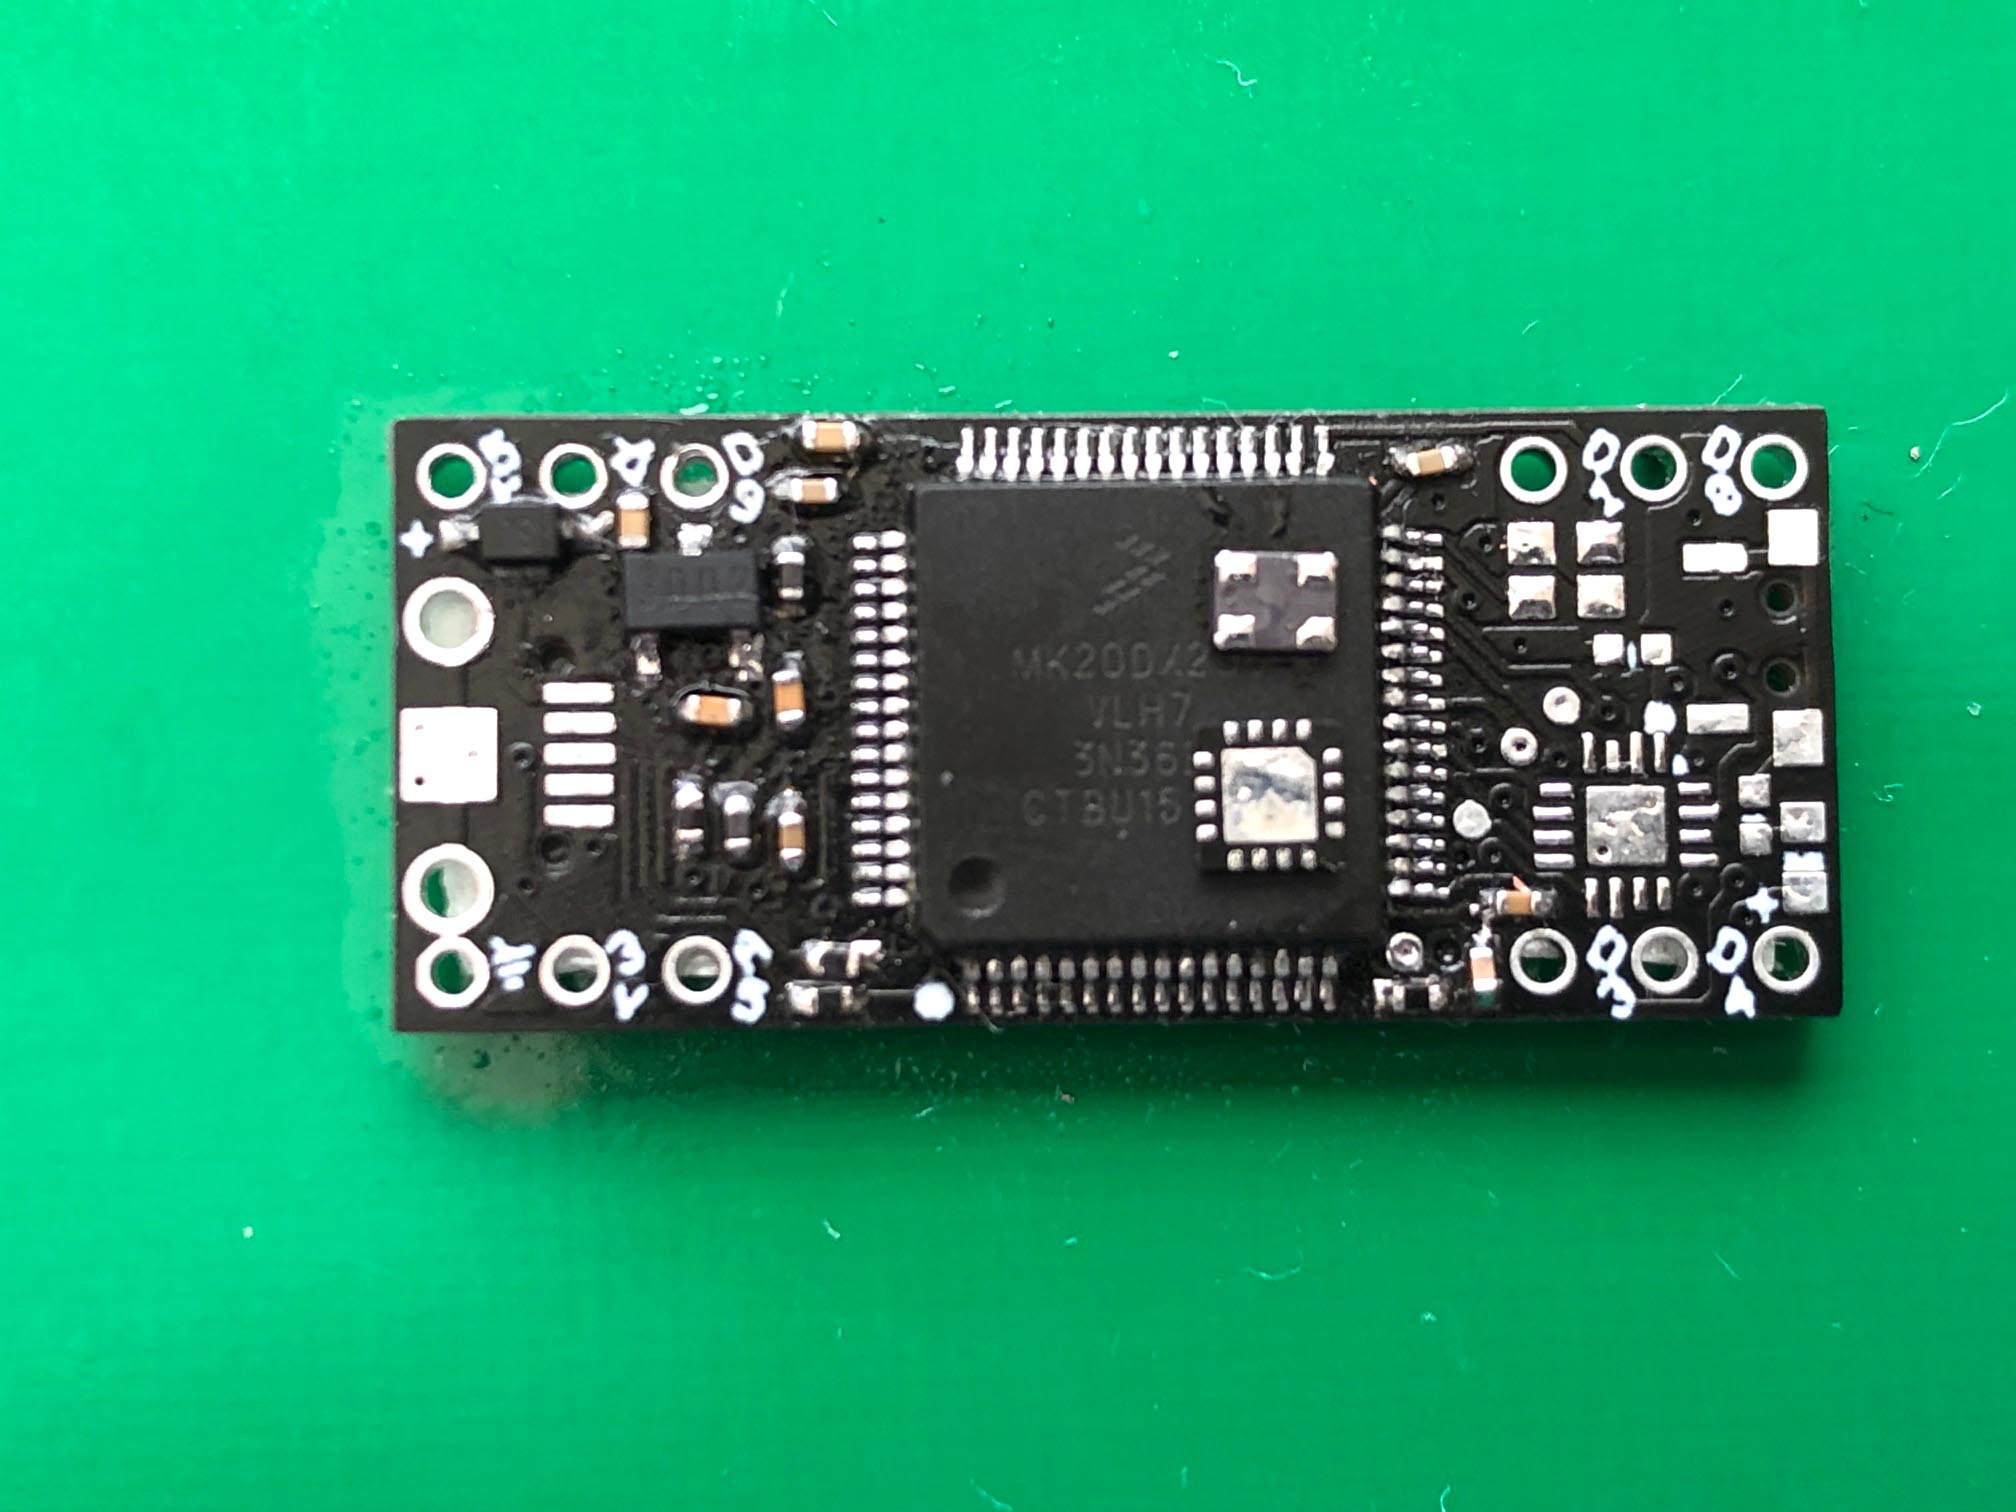
3. Solder in the order of D1, C1, U1, B1,
C2, C3. When parts are close together, the
soldering order is important.
For instance, if you solder the C3 before the
C2, it will be more difficult to hand solder the
C2. If you solder the U1 before the C1, it
will be more difficult to hand solder the C1. |
 |
|
4. Solder the R1, B2 and C6, then
R4,and R5, then C5 and C4. |
 |
|
5. Solder the C7, R3, C9 and C8. Tin
four Y1's pads, put more solder on the pin 1
and pin3, so when the solder is melt by hot air
the crystal Y1 is connected with the pads 1 and
3 first.
|
 |
|
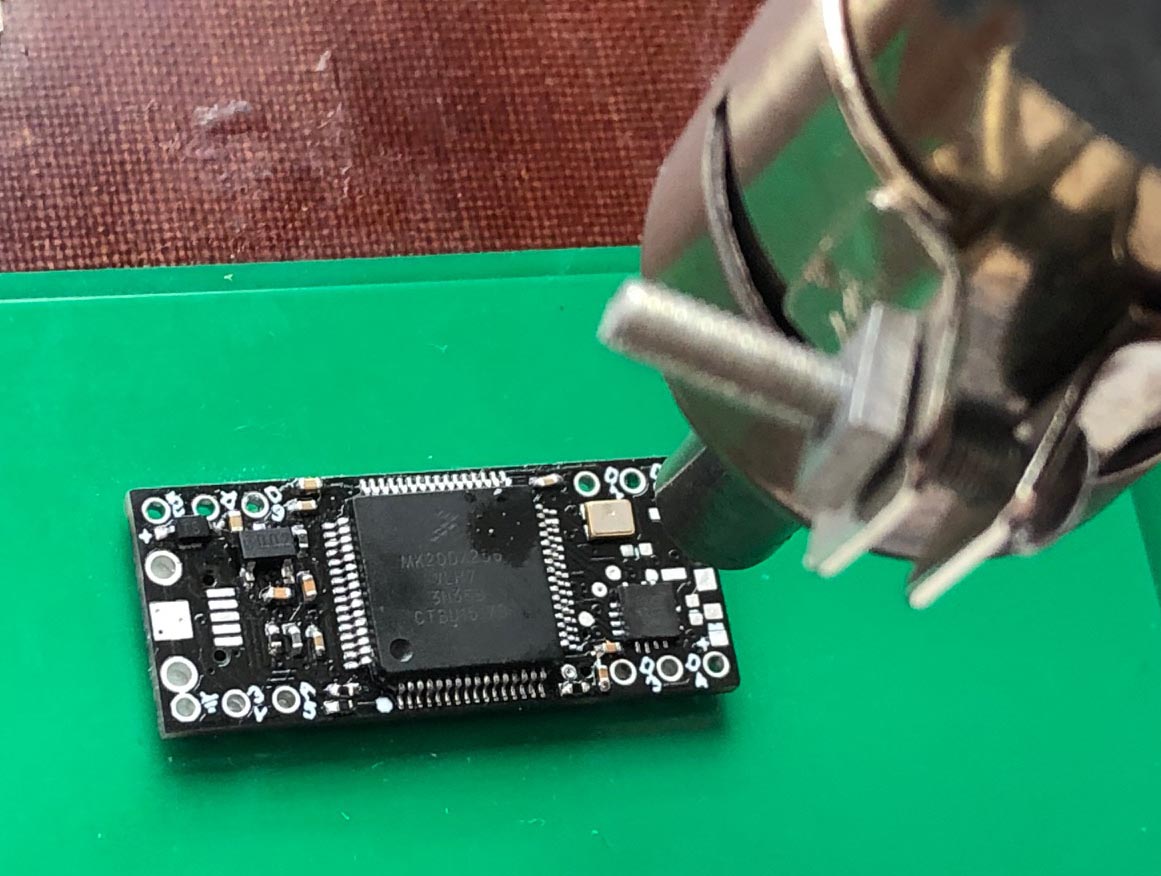
6. Tin the Y1 and U3 (bootloader) evenly
and add some flux on the pads for the Y1 and U3
before place them over the pads on PCB. Make sure
that orientation of the U3 is correct. If it's de-soldered from a teensy board, not a brand new,
you may use alcohol to clean the top to see the
tiny pin 1 dot. I don't have good eyesight, so I
used a magnifier to see the pin 1 dot. |
 |
|
7. Use a hot air gun to apply heat to the
Y1 and U3. |
 |
|
8. Visually check the connections of the
U3. This is the most critical step in this
process. If a pin is not soldered well, re-solder it with flux.
Only the Pin 1, 2, 4, 6, 7, 8, 9,10 and 13 need to
be checked, other pins are not used. |
 |
|
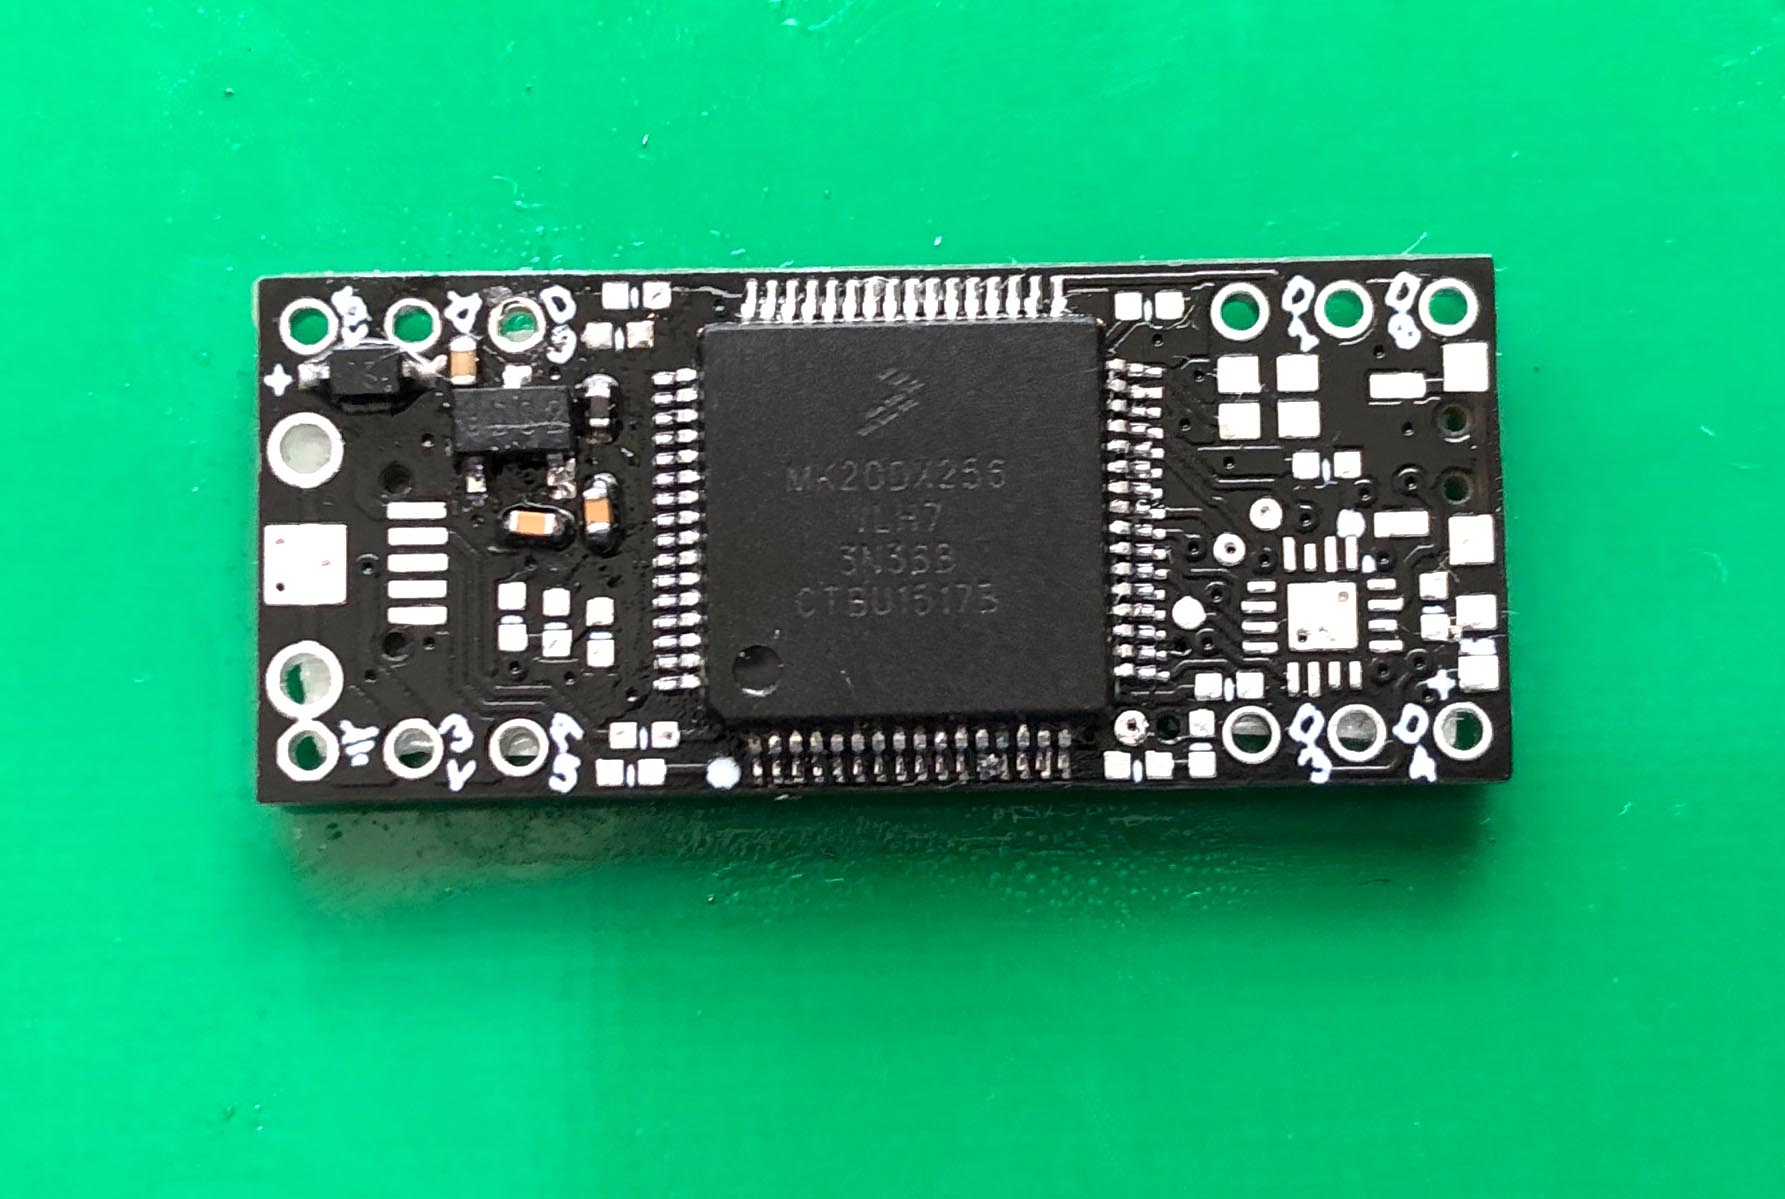
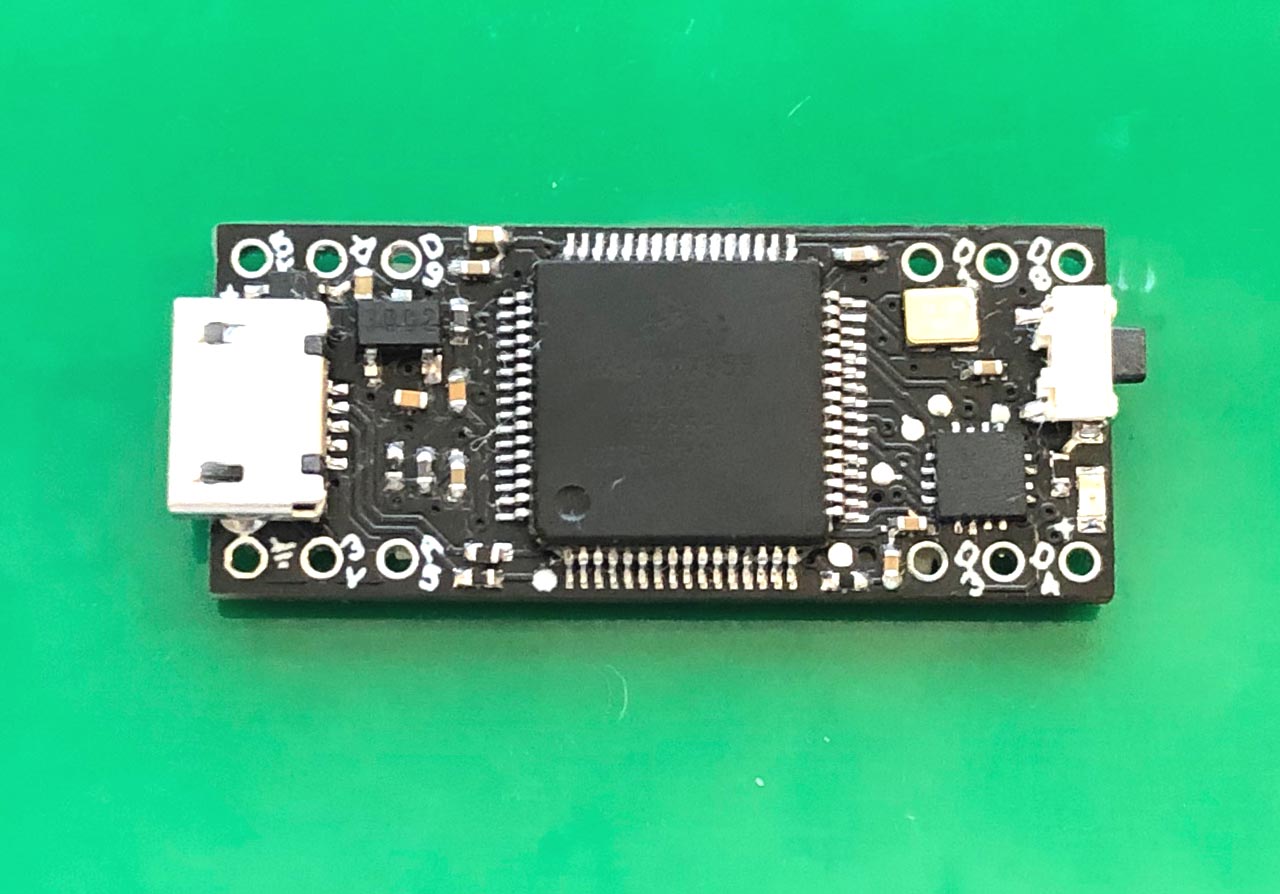
9. Tin the 5 USB jack's pads and pads on the
PCB, then solder all 5 pins. With enough flux it
can be done easier than you think.
Solder the C10, R2, LED1 and S1.
If you use non-clean
flux use alcohol to clean all solder residual before washing.
Wash it thoroughly with a small brusher, or even
a tooth brusher. After washing and cleaning, use a hot
air blower or a hair dryer to dry it.
If you don't have Non-clean flux on hand, you
can use 91% Isopropyl Alcohol from Wal-Mart to
replace it, it may not be as good as the flux, the result
may be good enough.
|
Mini T3.2 Assembling instructions
for soldering two male haders |